The original Boss Frog installation instructions are still available to read online, even though the original website is no longer in existence. Somebody uploaded those instructions to a database somewhere and I’ll be forever grateful for their foresight. And you can click this sentence to go directly to those installation instructions!
I used the original install instructions as a guide alongside this helpful walkthrough with buttoning up the rest of this install. After all, the bar itself isn’t just the only thing you need some help with. I didn’t take any photos of the first couple steps, but basically I had to modify the parcel shelf section to fit around the double hoops.


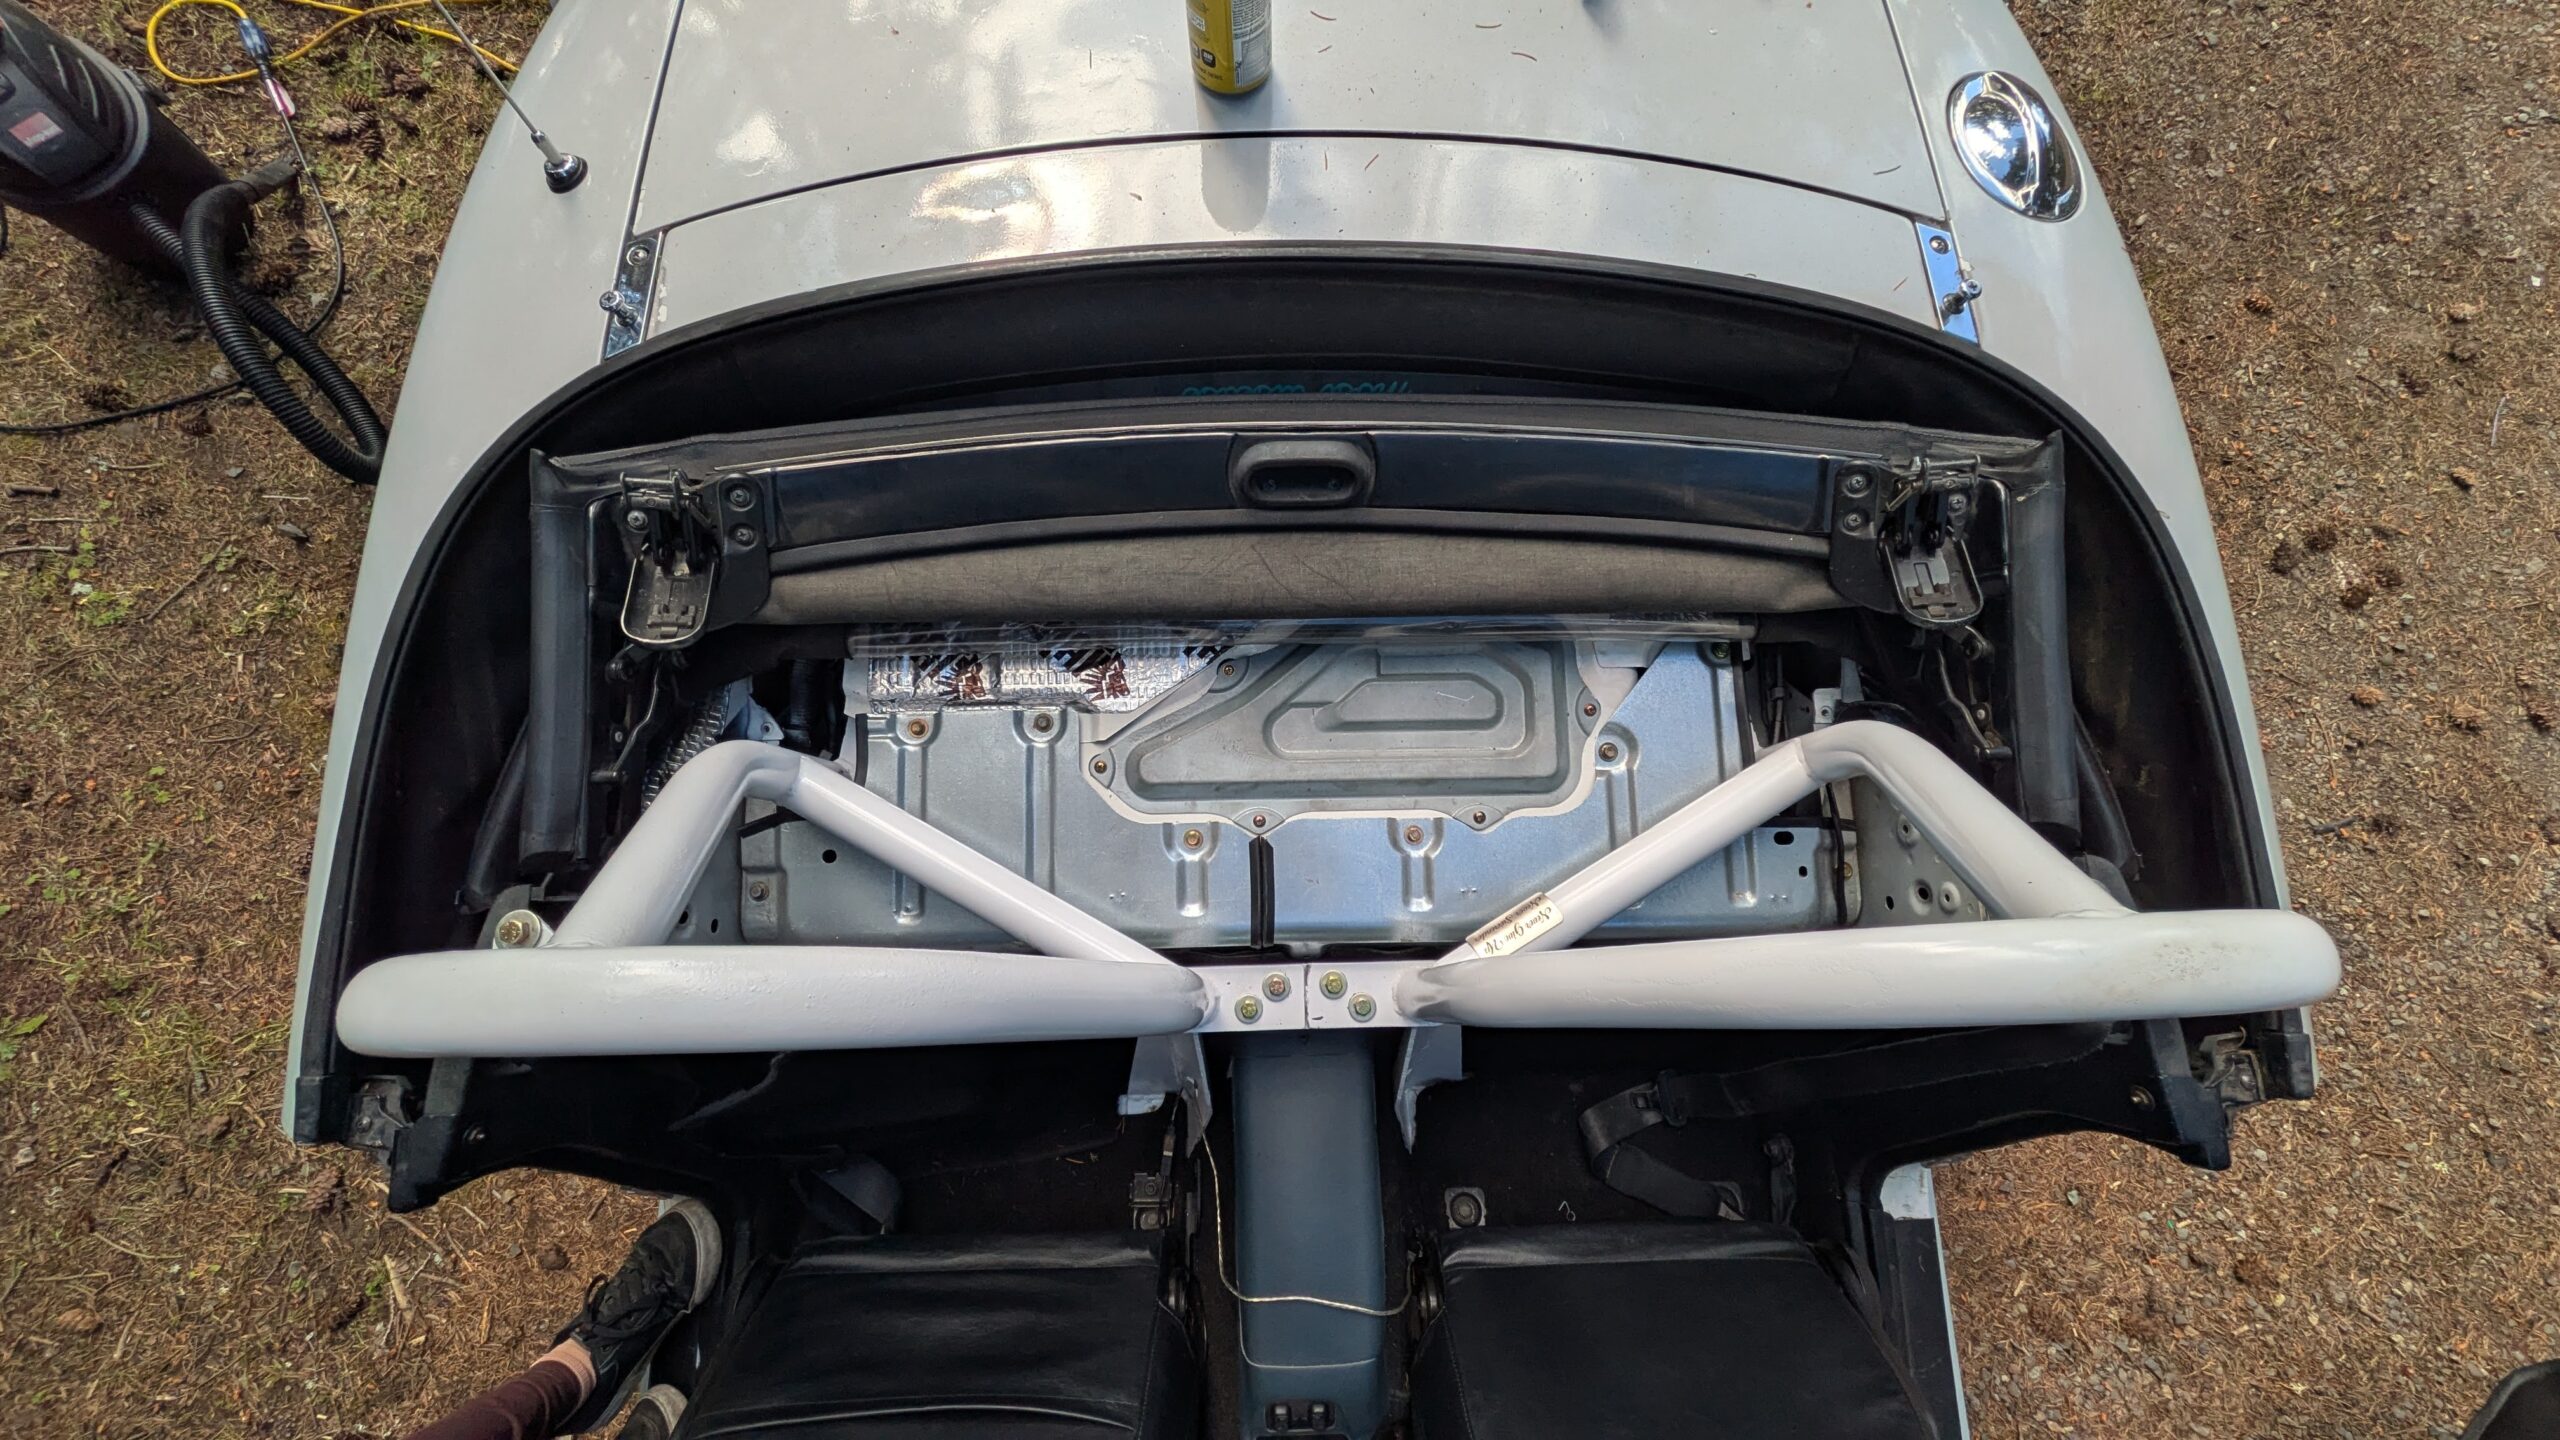
The install instructions say to cut the shelf in half, and then vaguely mentions cutting a section for the rear bar. It doesn’t give clear instructions, and only has a cut template for one side, so I used tape and went rough. Then I half-placed one half in, measured some more, and made my cuts. You can see in my photos, but I had already modified my parcel shelf for my previous rollbar. I didn’t photograph the cuts but after looking at it some more, I decided to just lob off the tabs that sat behind it since they were already pretty modified.


Here are some photos to show how and where I made my cuts, in case you need to cut yours too and don’t want to go through test fitting and trial and error. You could easily maintain the rear holes, unlike mine, if yours is uncut still. I’ll just have to live with these unsightly squares under my carpet TT-TT. The NB install guide by Kepone recommends cutting the package tray into 4 parts, but I didn’t think that was necessary.


And then I used some door guard that I had laying around to clean up the edges that I had cut, since they were a little rough. The passenger side is a little close to the bar, but doesn’t touch when bolted down, so I’m satisfied enough, although I would recommend cutting just a little bit further.


And best yet, the top down shots. I’m pretty glad that it came out so well! As you can see by the door guard strip in the “middle”, I chose to offset the cut to retain the center clip hole.
And then, before I did the carpet, I spent the time to adjust the seatbelts. In Kepone’s install, he rotated the seatbelt to help the retractor, and the original Boss Frog install also has an entire step dedicated to this. I chose to ignore this step originally, and learned rather quickly that my seatbelts just no longer retracted. o-o Who would’ve guessed?

This is what I managed to situate, and my seat belts retract alright now! Not perfect but significantly better than they were before.
So now onto the carpet.


Cutting the carpet was actually very easy. I literally just used scissors. There’s a little notch in the carpet exactly where the rear of the bar sits, and then just measure forward the thickness of the bar to cut the front. I chose to fold the carpet and tuck it under the parcel shelf, rather than actually cut a square/notch. Ta-da! So anyway, I just need new carpet tabs, and it’s all buttoned up!
I was able to accomplish this part of the install entirely by myself, but it did require getting in and out a lot and putting up and down the top a lot. I still think it was worth it!