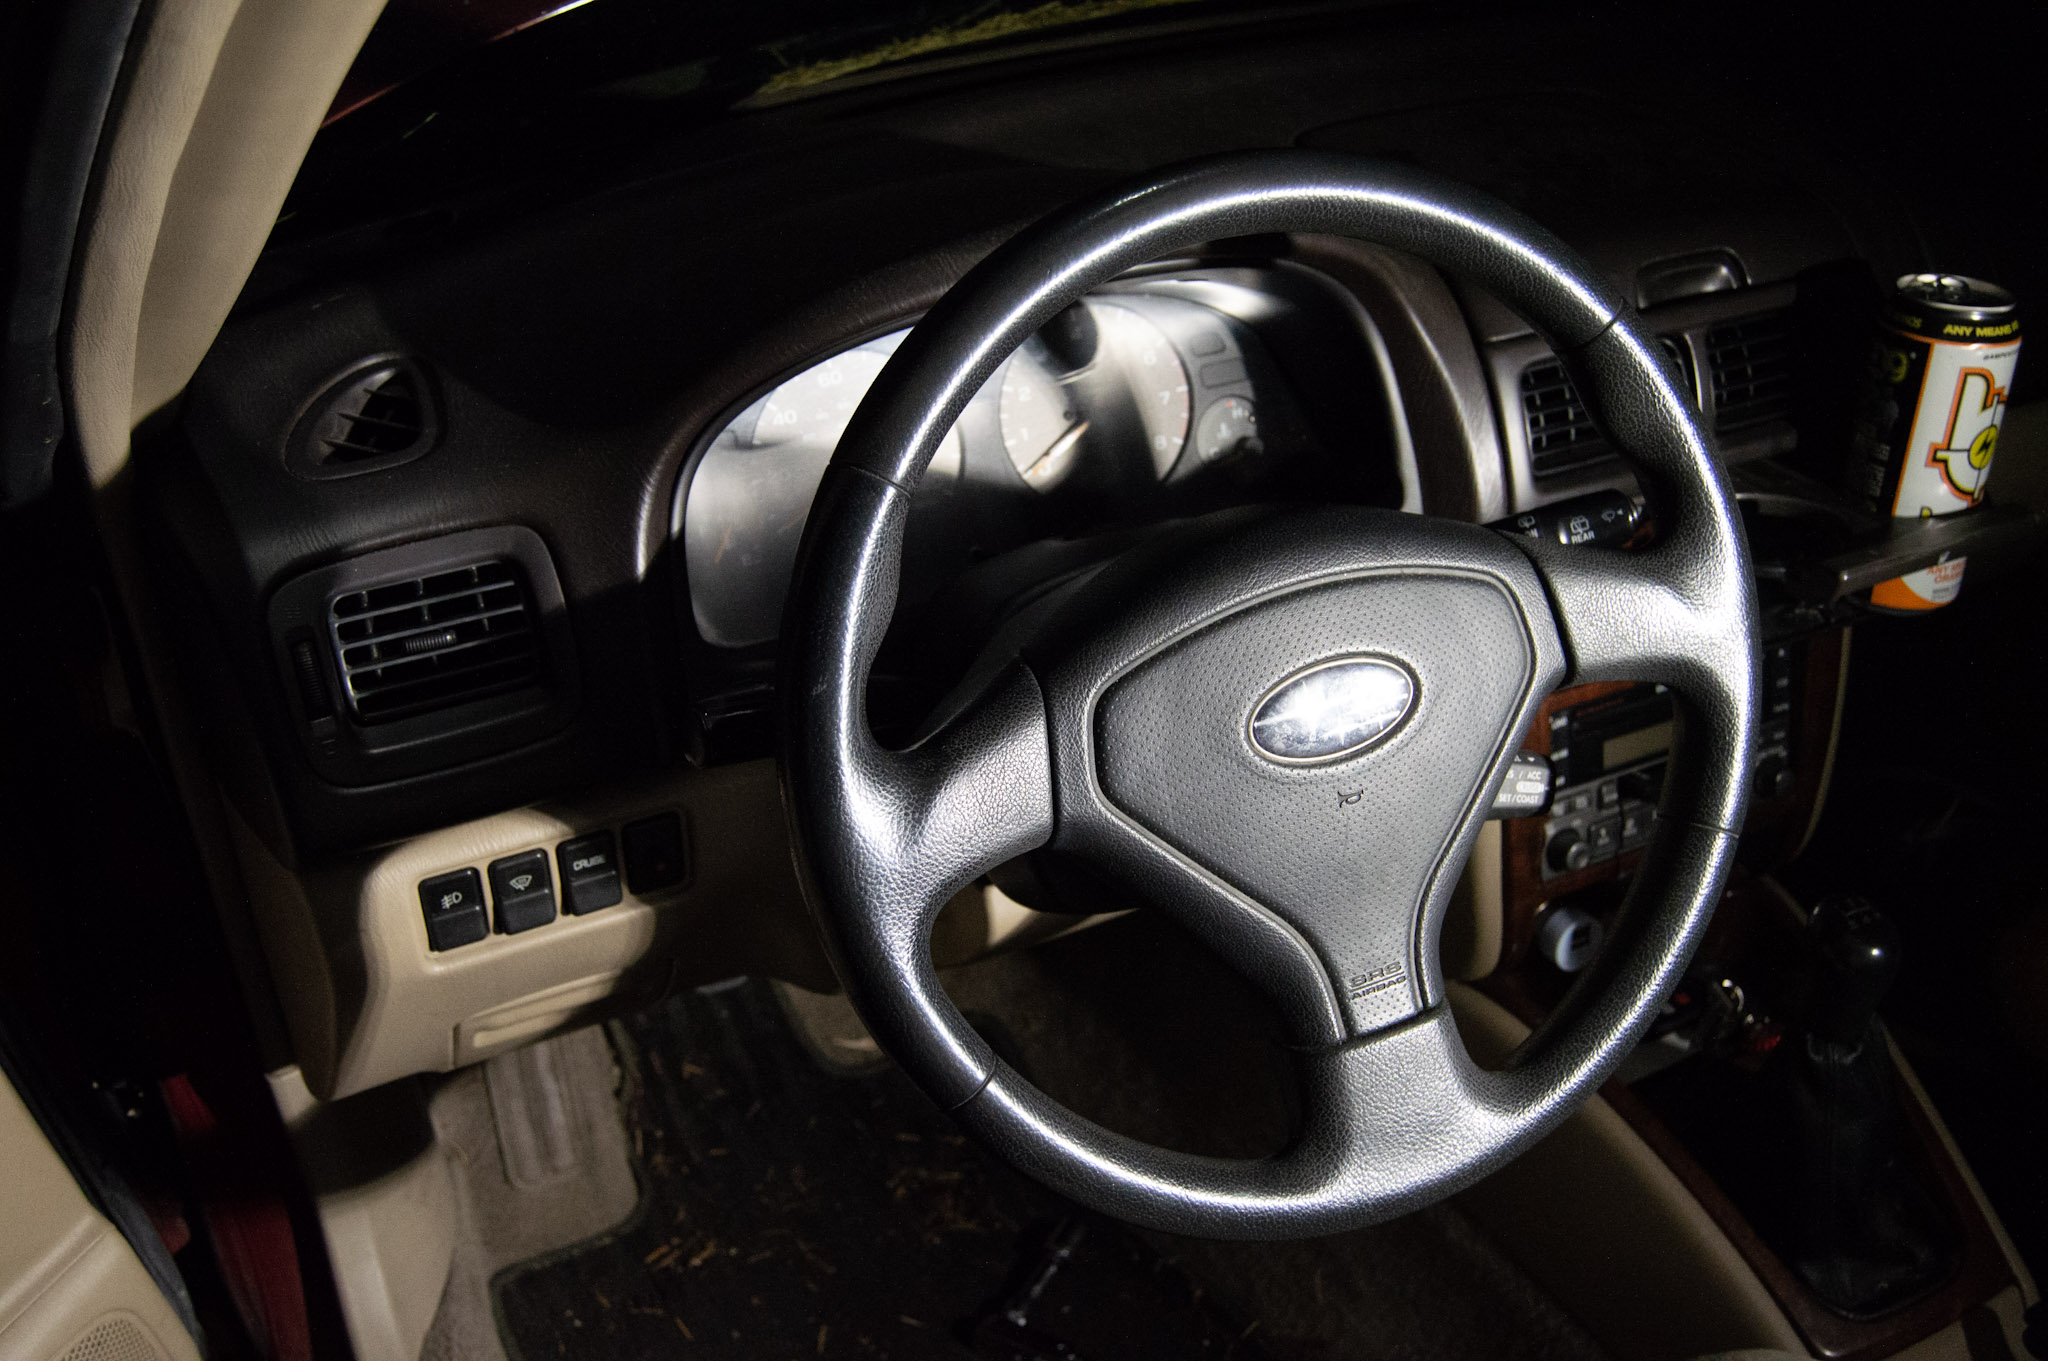

Okay, so, the NA Miata had a factory option elsewhere in the world that had a combo Fog Light/Defrost option. This switch is like $80 “brand new” if you can find one. I’ve been looking for a used one for years with no luck. Cuz honestly, who would part with one if they have it? But I’m ballin’ on a budget, and can’t justify the money for a switch.
Well, the NB Miata came with a combo Fog Light/Cruise Control combo switch in the States. I figured, what the heck, why not give it a try? And turns out – if you’re try-hard enough – it will work for other things.


Think about it: switches are essentially just on/off buttons with labels. If you disregard what the switch itself says, then it just boils down to the basics: one pair of wires for the bulb illumination and one pair of wires for each button. On the NA, it’s that simple: 6 wires. On the NB, they added two more wires for the extra bulbs that illuminate when each switch is depressed.

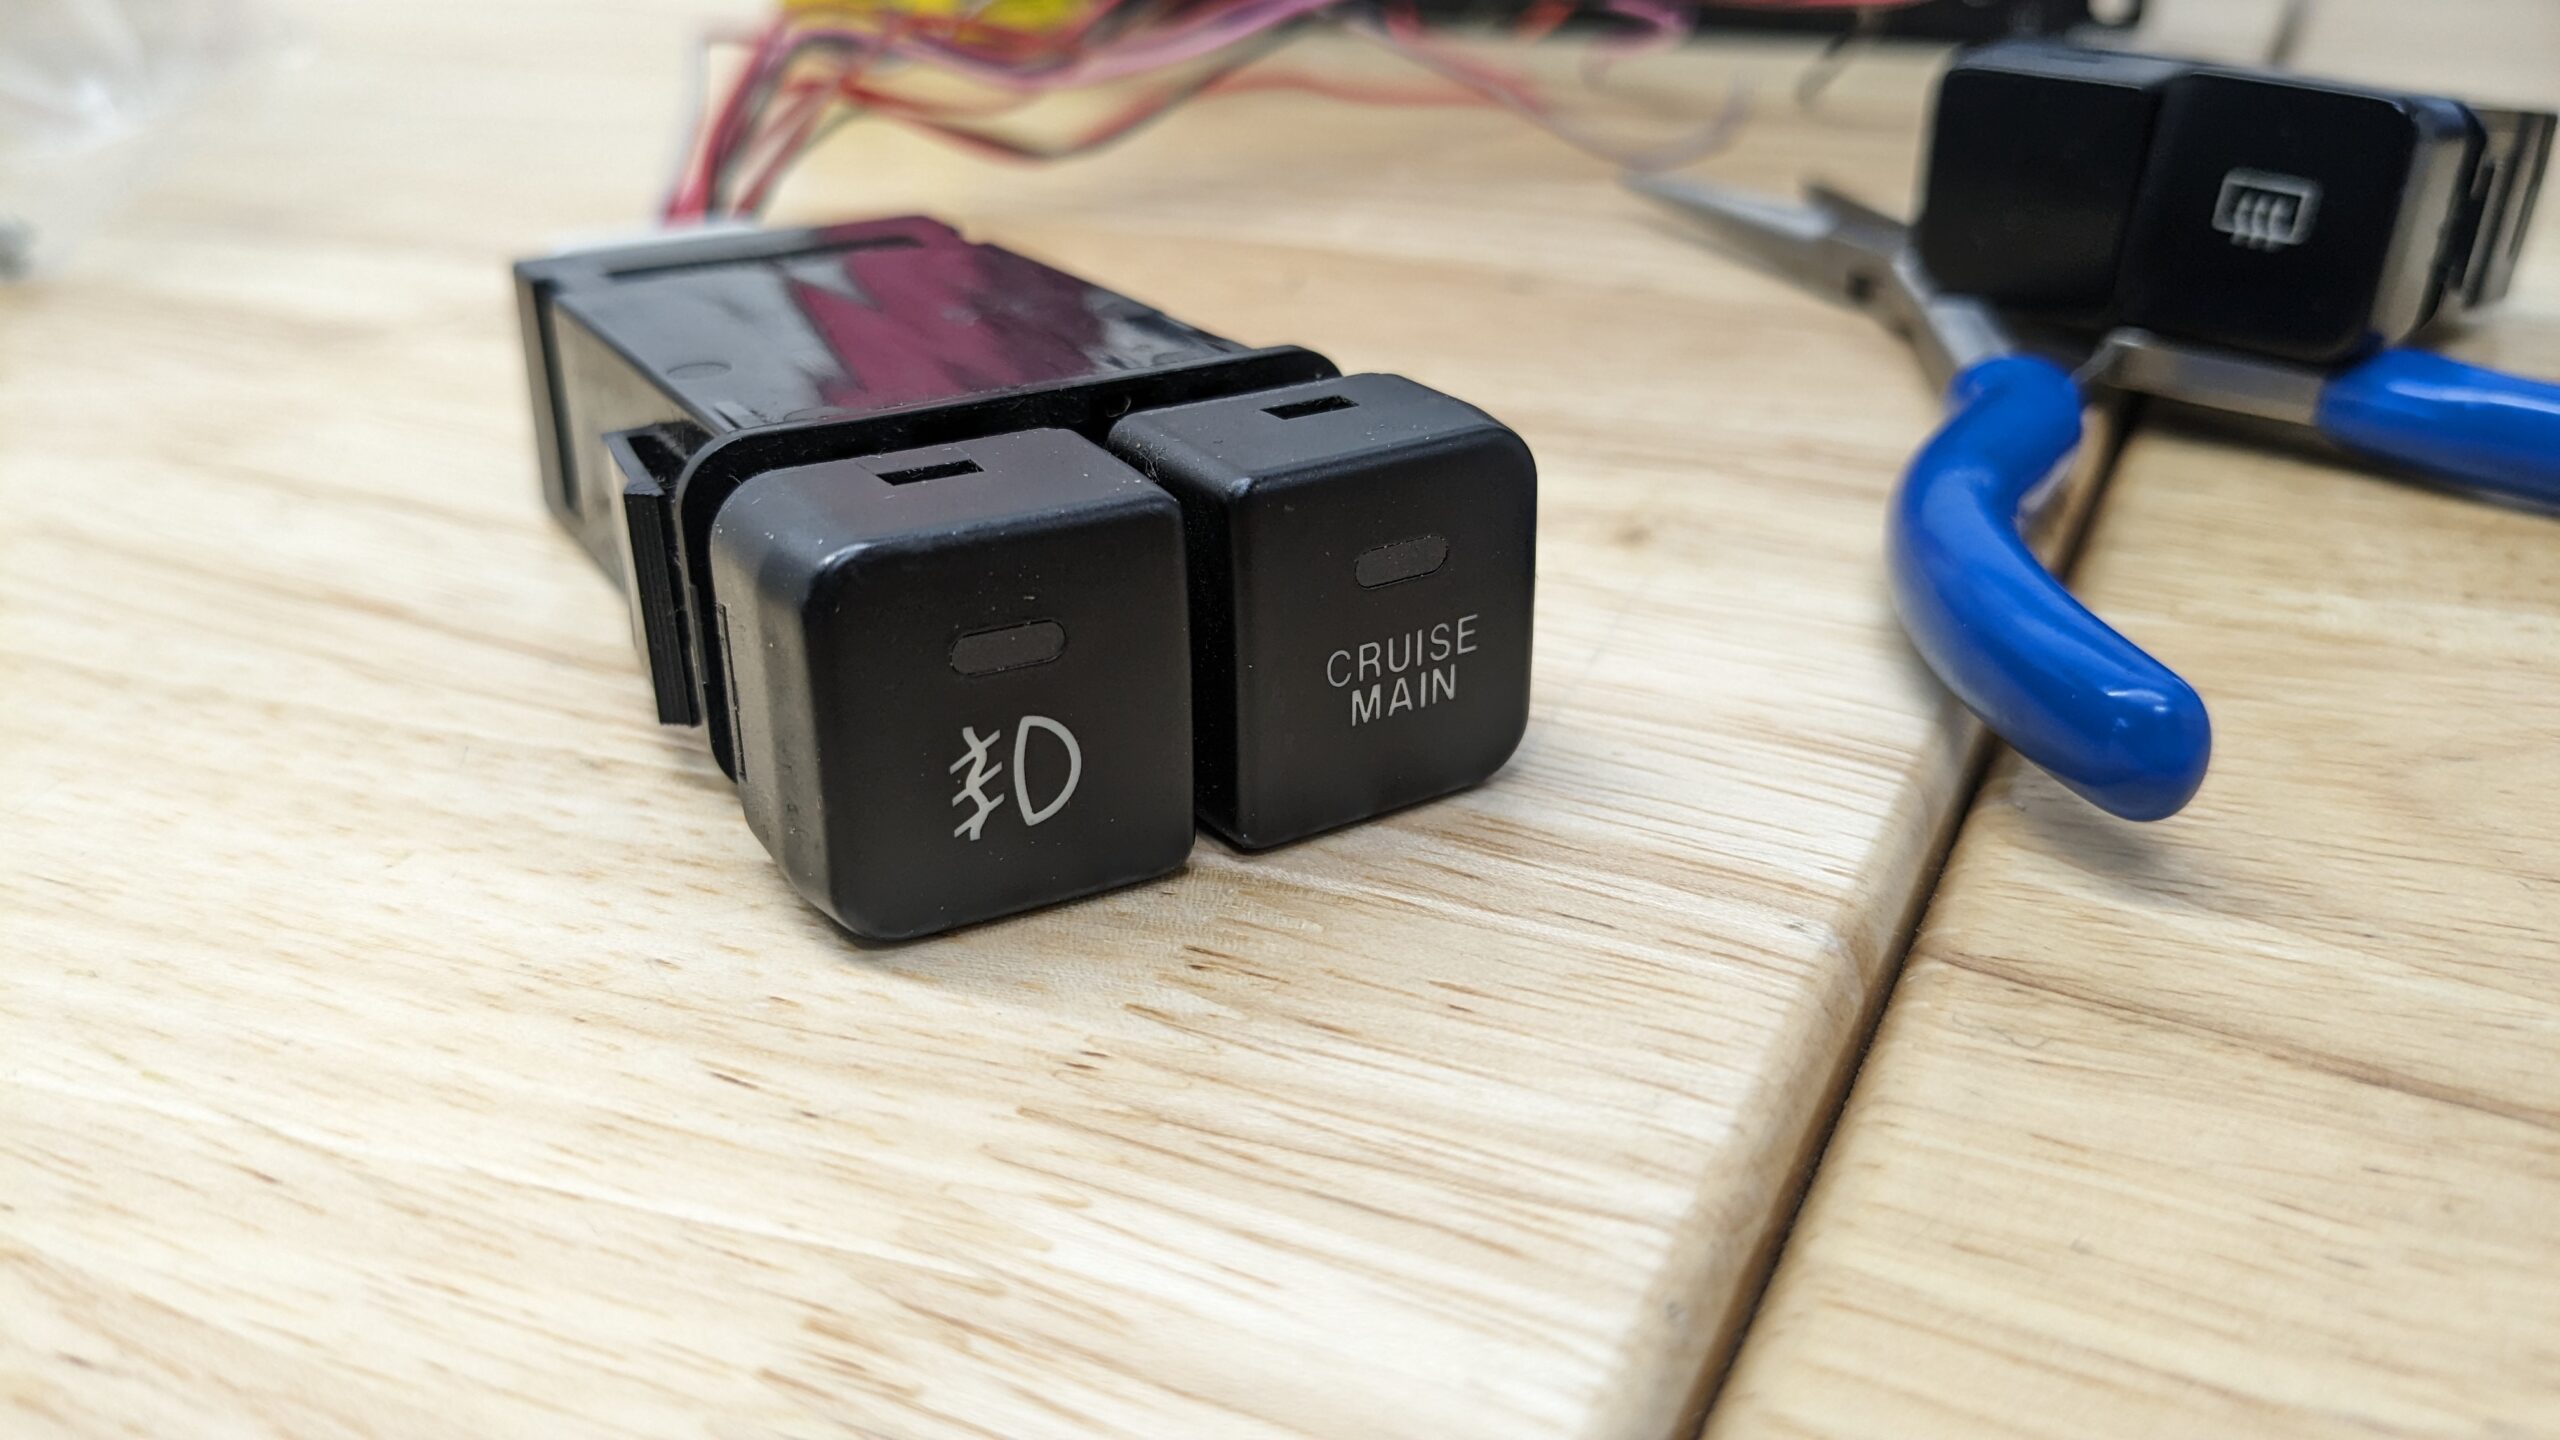
TURNS OUT THE NB SWITCH IS PLUG AND PLAY WITH THE NA SWITCH* *if you don’t care about the illumination. In fact, the fog light button is even on the left side of the switch, which is how it’s wired from factory! If you just simply need a dual button switch instead of a single, and don’t care about it lighting up or the fact that the defrost button will say “Cruise Main”, YEET. Plug that shit together and send it.

But here is where the fun begins: illumination and deconstructing the switch.
I’ll start with illumination. This requires the connector to do correctly. You will also need a pick tool and/or depin tool if you don’t want to wire/solder anything. The NA pins are slightly smaller/shorter than the NB pins but still fit perfectly into the connector, and still make contact with the switch pins. If you are really concerned about the connection points, though, it’s easy enough to cut and solder/crimp the wires together.

You can see that the 6 pin NA switch has the illumination pins in the one spot that the 8 pin NB switch doesn’t have anything at all. If you’re a master at depinning, just make sure you move those two pins over to the outside.

**I’m still working on the illumination for the buttons when they get pressed, this might require a little extra wiring (i.e. t-taps if you’re not a soldering guru, altho I don’t recommend them for long term) to work properly, but I’ll update when I have an update**
Deconstructing the switches is not a task for the faint of heart nor those who are afraid of breaking things! You WILL mar up the button or switch if you aren’t careful, and you will probably break something. I did.

Taking the cap off the NA switch was considerably easier than the NB switch. I broke my “cruise main” cap off the NB switch, but good thing I didn’t need to keep it. The defrost one off the NA came off really easily. Keep this in mind as you try to pull it off: do not pull or pry out, as the whole switch mechanism can pry out accidentally, and bend the flimsy clip that makes the switch actually function. It’s a simple thing to fix, but not easy to replace – and when I took mine apart, the little clip went flying – and you don’t want to lose it, or your on/off switch becomes a momentary switch instead (which defeats the point).


Once you’ve got the “cruise main” cap off, you’ll have to pull this clear piece out, unless you can precisely cut a hole in your cap to fit it. As you can see, I decided not to LOL. It also requires some trimming to fit the NA cap. If you look at the insides of the two caps, you’ll see the NA is “deeper” than the NB.

If you look at the two switch caps above, you’ll see what I mean. You might not need to cut off the entire shelf, but I decided to cut the shelf out too. You’ll see what I had to do below:

The little shelf had to be trimmed off (compare the two photos), and I trimmed out a little bit of the part where that clear piece goes so that the light from the bulb there actually hits 100% of the defrost part. I figure, for this, it doesn’t matter if the button gets illuminated when it’s pressed in, because your gauge cluster should illuminate to show you that your defrost is on. I felt big RevLimiter Gauge install vibes cutting this, because most of his gauge sets require trimming the inside of your gauge cluster to fully illuminate. Haha

Okay, here’s another thing: the cap for the defrost from the NA is just barely not the right size for the NB switch. I recommend using a tiny edge file to shave a little bit off the clip sides so it snaps right in. Otherwise, if you’re too aggressive with the button, there’s a possibility that the cap will pop off. [This only applies if you’re trying to swap the caps so it shows defrost instead of “cruise main”.] If you’re like me, and too lazy, or don’t have the right tool, it will still work – just know that it won’t be perfect, and the fit will be slightly off (see photos below):


See how the defrost cap pokes out a millimeter further than the fog light cap? It doesn’t bother me, personally. But if you require perfection, you just have to sand down the cap latch a fraction and it’ll fit better. You can also add your favorite glue to make sure the cap doesn’t just spontaneously pop off on you.

Now, you just have to put the bezel piece on your switch (I have extras available in my shop if you need one!), and pop it into it’s little cubby in your dashboard! Double check that it functions properly and you should have a DIY switch now 🙂